


Welcome to the new Datex User Portal! This guide will detail the steps for accessing and utilizing the Support Portal to submit support cases (tickets).
Help & Documentation

Frequently Asked Questions
Help & Documentation
-
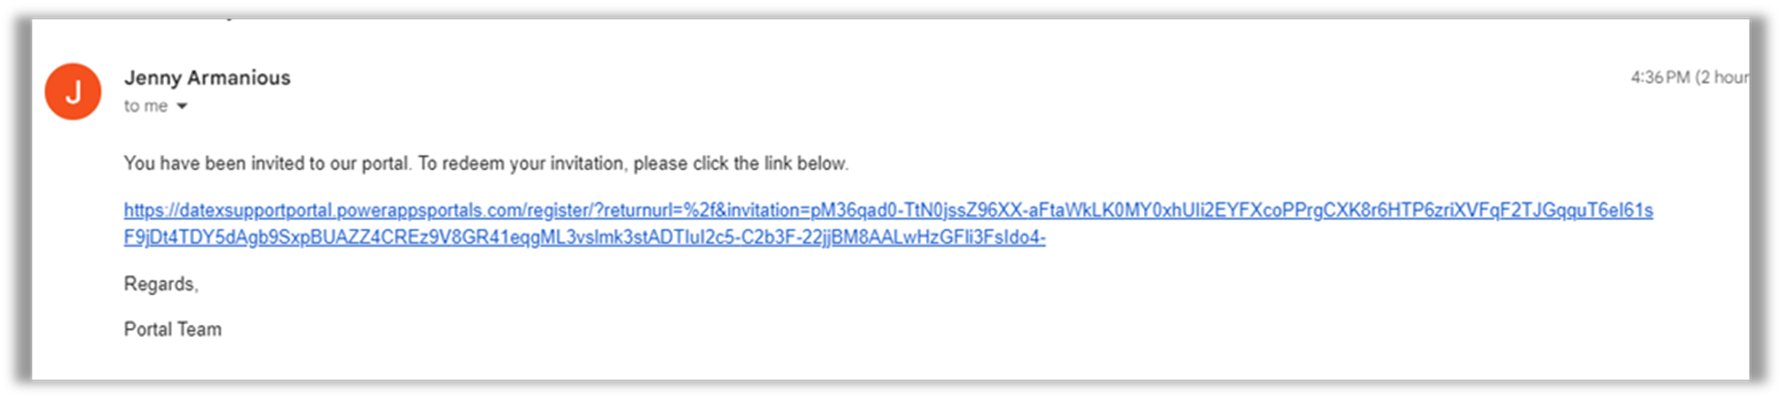
You will receive an email from a Datex resource, inviting you to redeem your User Portal invtation. Click on the link in the email.
-
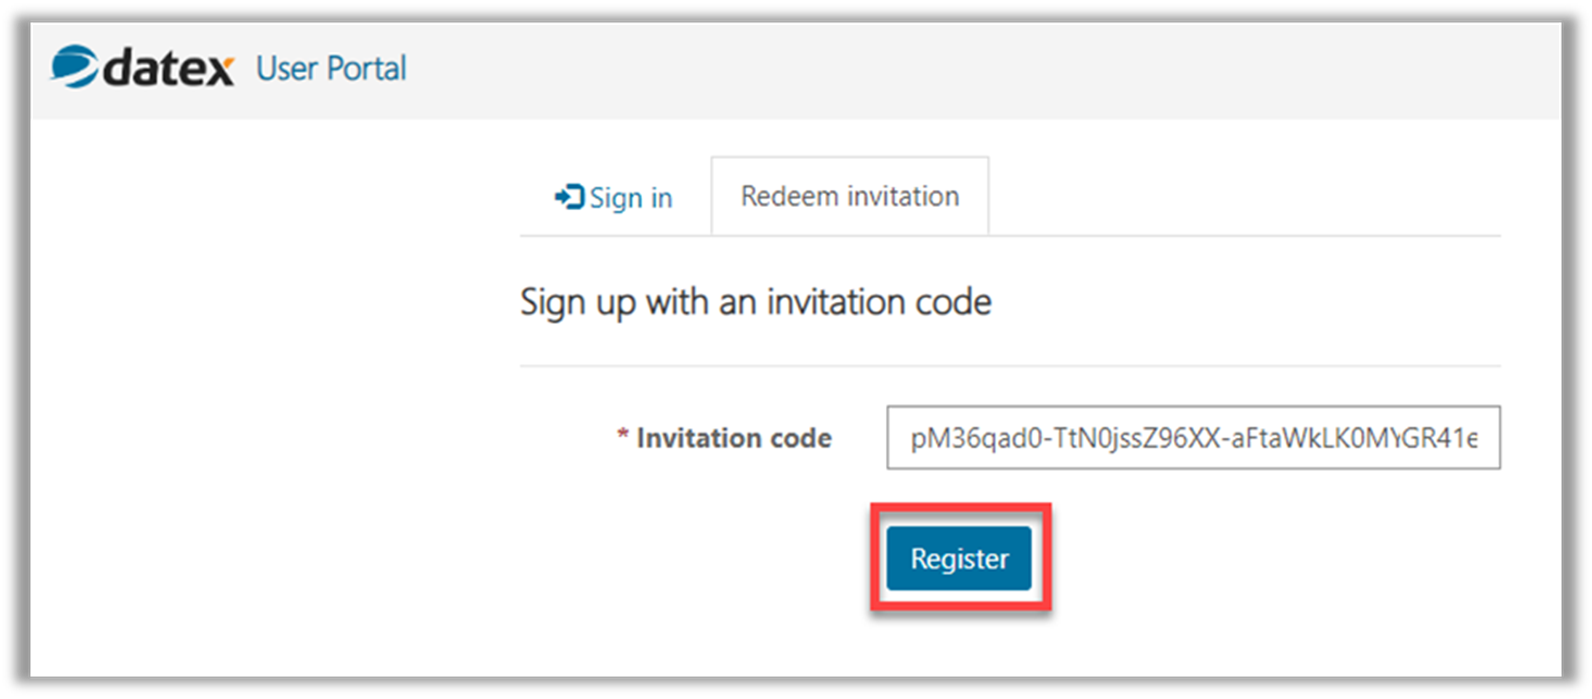
The link will bring you to the Redeem Invitation tab in the User Portal with the Invitation code automatically populated. Click Register.
-
Complete the registration information as follows, then click Register.
- a. Username - your registration email.
- b. Password - A complex password including one uppercase letter, one lowercase letter, one number, and a nonalphanumeric character.
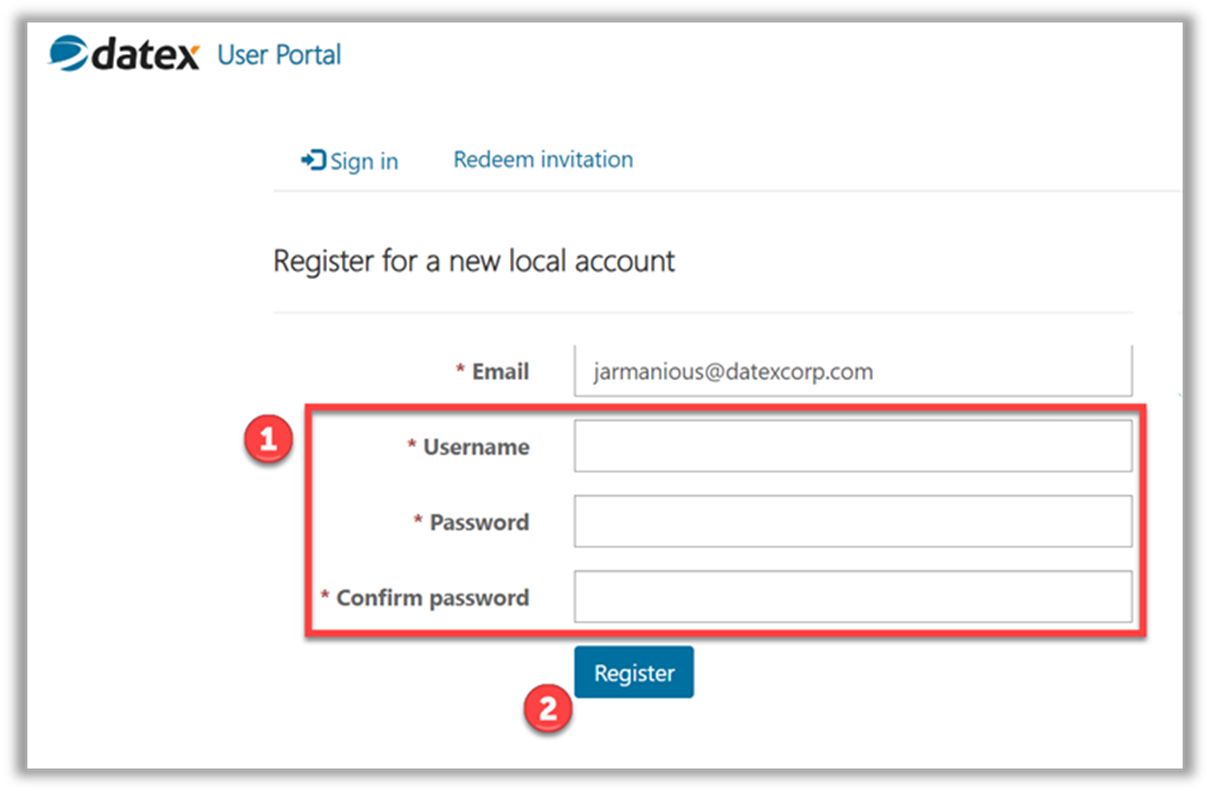
- From here you will be brought to your Support Portal Dashboard (save this as a bookmark).
Navigating the User Portal is quite simple, as data has been streamlined with the end user in mind.
-
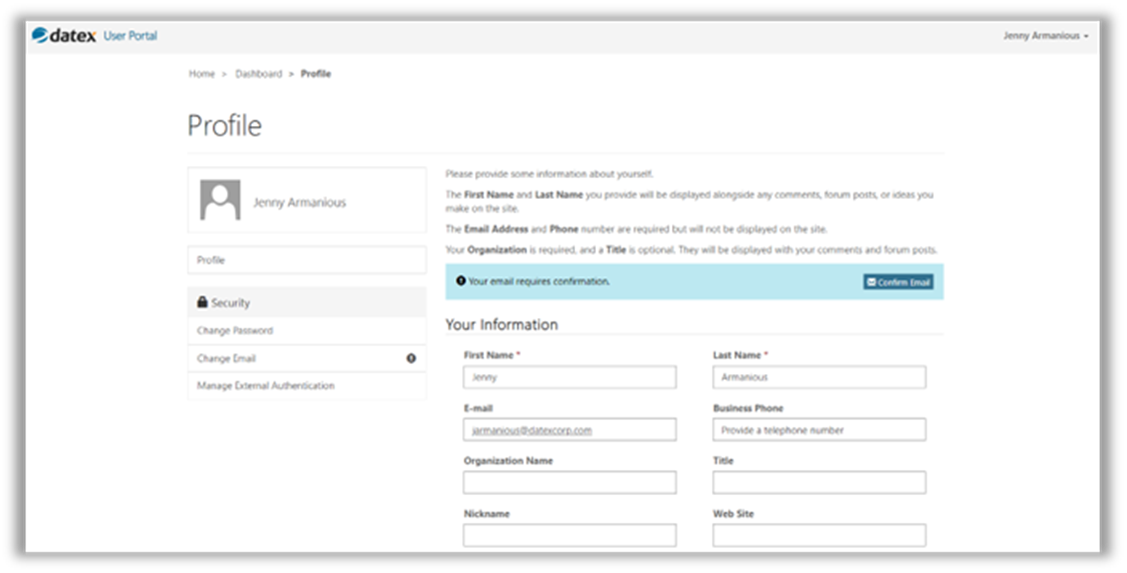
Click on the dropdown next to your name to access your Profile. Here you can modify your basic information, change your password, and update your email.
-
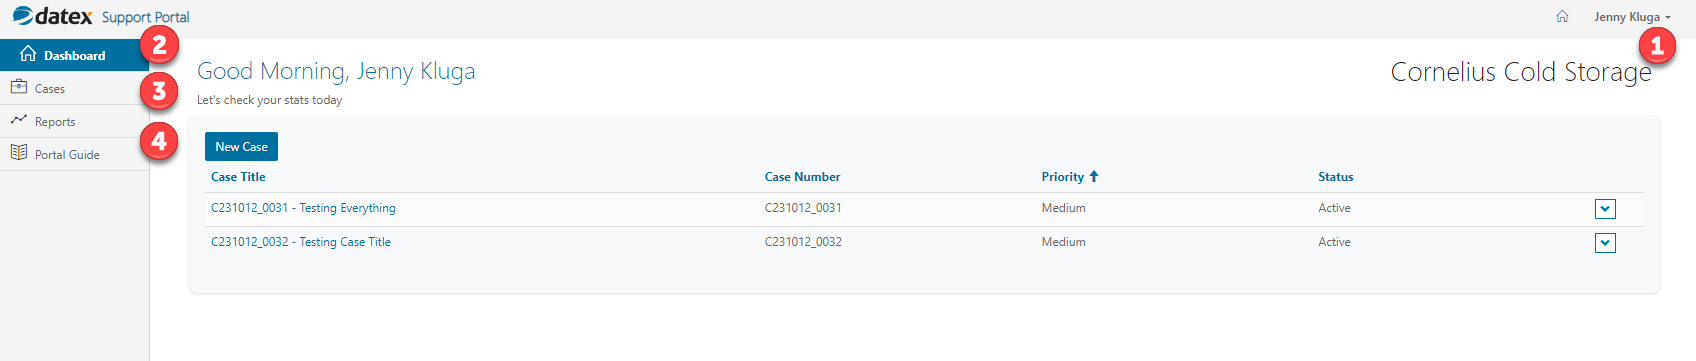
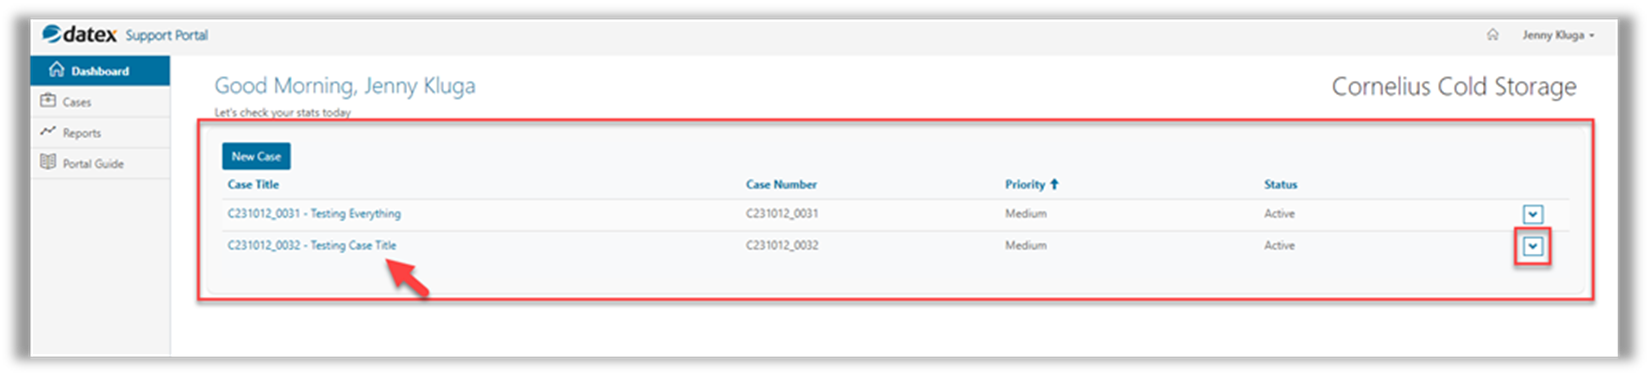
The Dashboard is the main landing page of the User Portal. All cases you have created willpopulate here. Click on the Case Title or the arrow drop-down to view Case details. You can also create a New Case from the Dashboard.
-
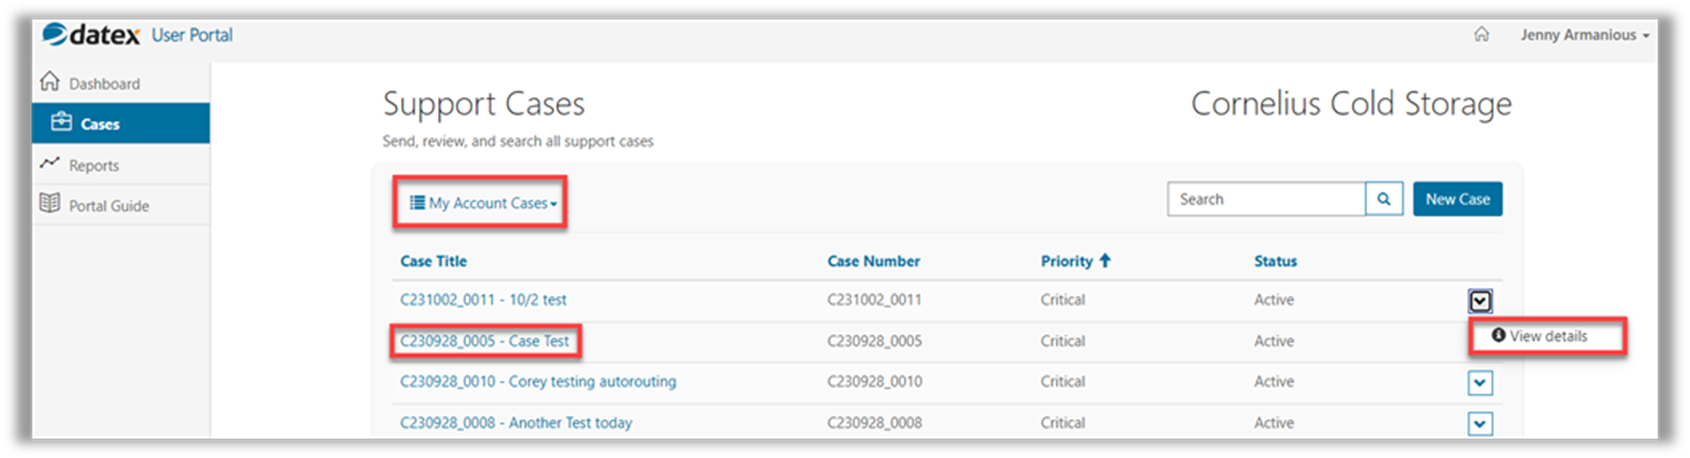
The Cases view is where you can enter, review, and edit details for all support cases. As with the former portal, you will engage with Support resources within active cases to resolve your cases. You can also ort by All and Active Cases.
-
The Reports and Portal Guide views are coming soon but will have relevant reporting data and Support Portal guides and FAQs.
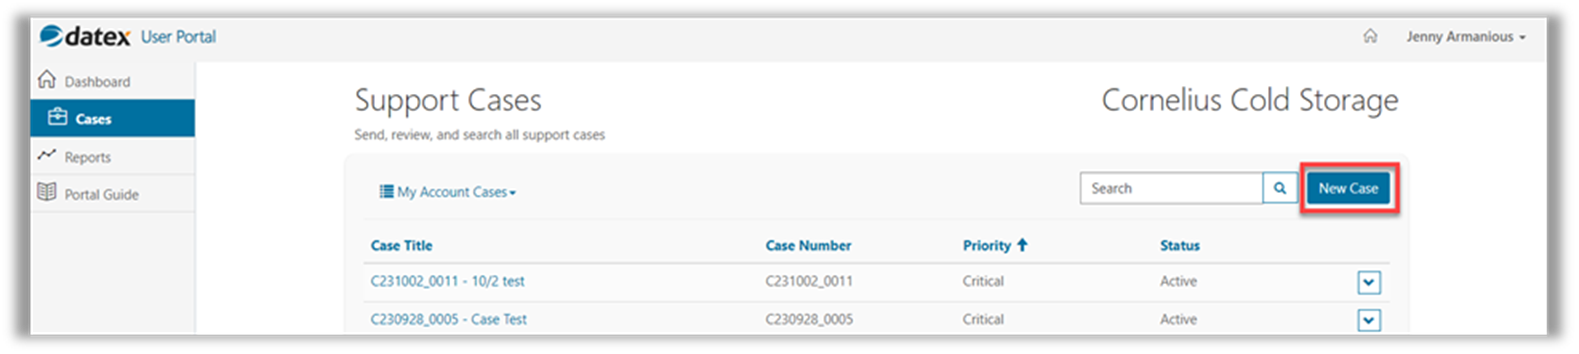
The New Case button on both the Dashboard and Cases views allows you to enter a new case. The case form is built conditionally, so only the pertinent fields related to the Case Type are visible.
-
Click New Case.
-
The Select Case Type drop-down will appear. Select the appropriate Case Type.

-
The appropriate Case Form will display. Complete the form fields (making sure to follow best practices - the more details in the Description, the better!). Click Submit.

-
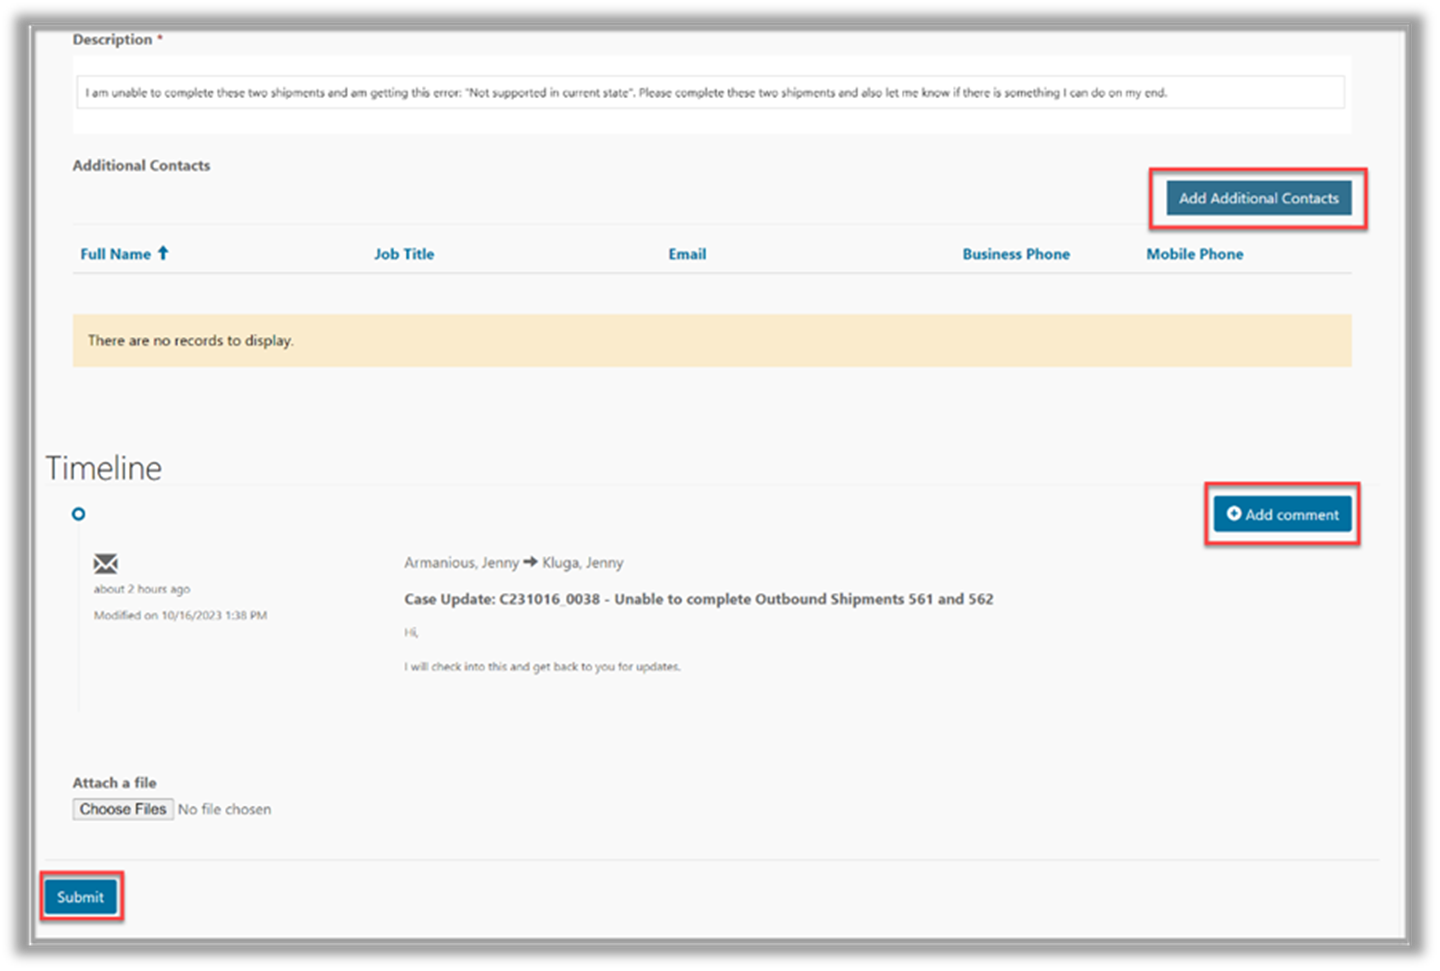
Once your New Case has been created, you can navigate back to the case to add Additional Contacts associated with your Account, add a comment, or attach additional files. The Timeline is where you will see responses from Support resources. Click Submit.
-
Of note, once a Support resource has responded to your case, you will be able to communicate through the portal or your email. Just make sure to Reply All.
-
The Datex Support resource assigned to your case will continue to work on your case until a Resolution is achieved.